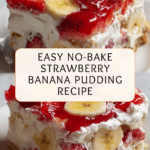
Strawberry Banana Pudding Dream: Easy No-Bake Recipe! Recipe
Introduction
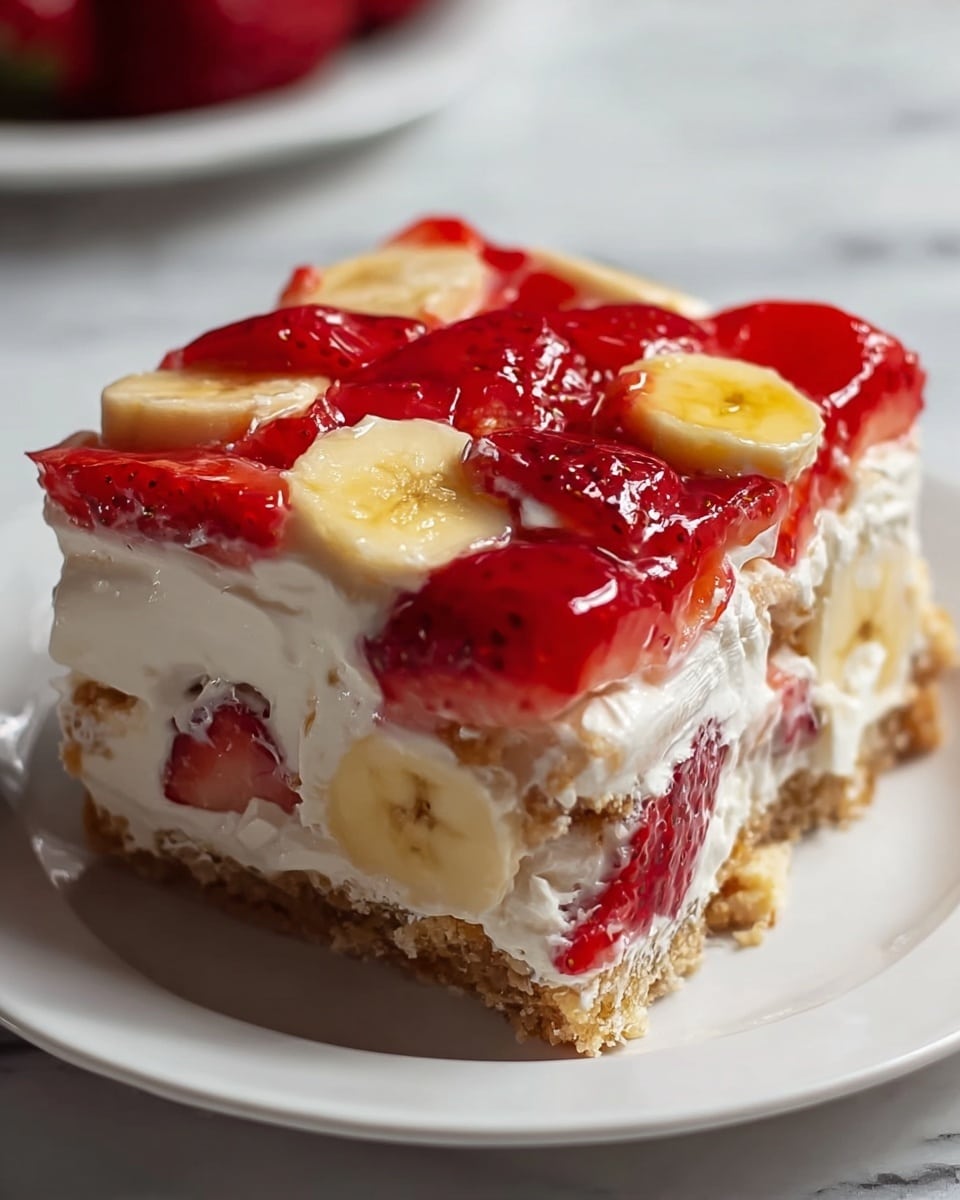
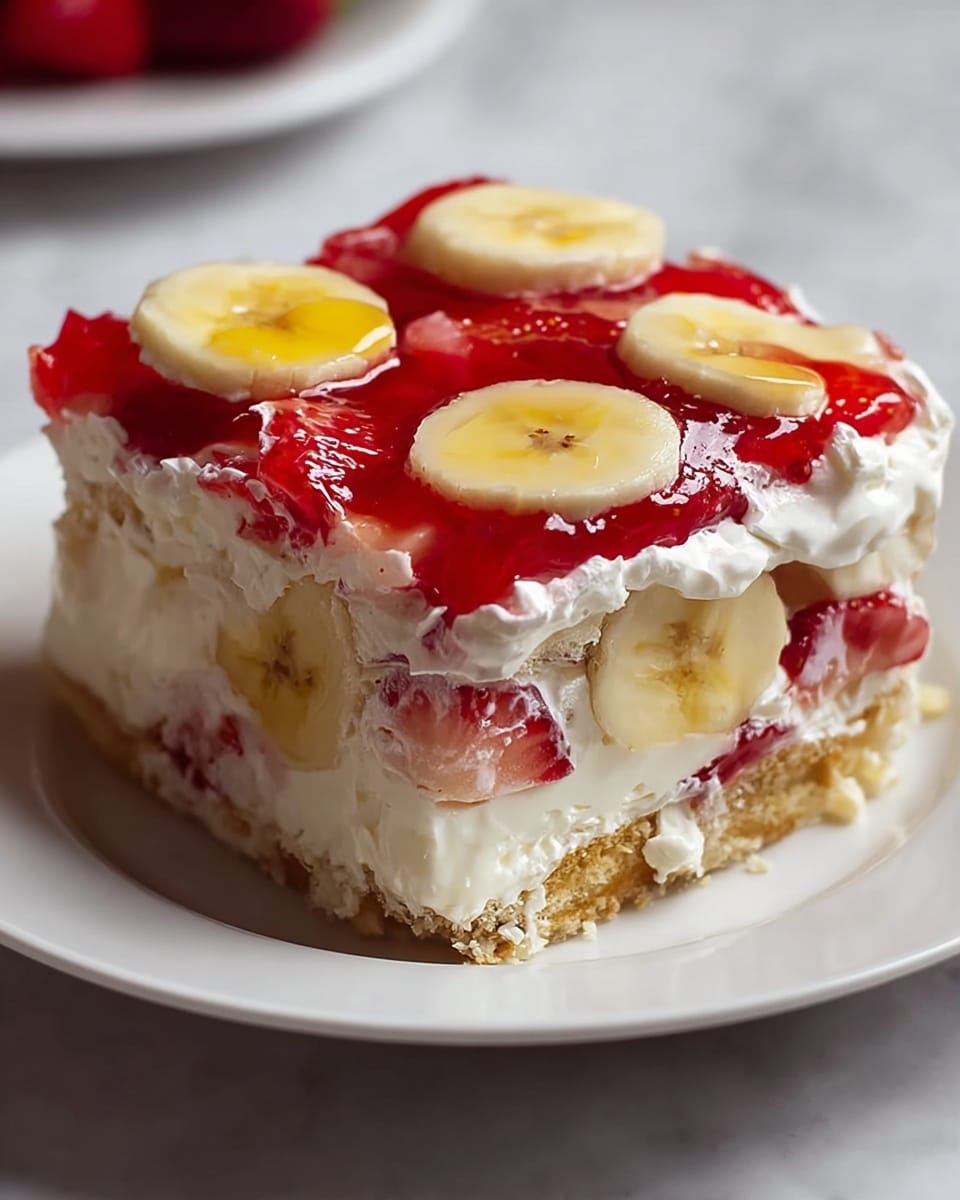
Strawberry Banana Pudding Dream is a delightful no-bake dessert that layers creamy vanilla pudding with fresh fruit and crunchy vanilla wafers. Easy to assemble and perfect for any occasion, this treat combines sweet bananas and juicy strawberries for a refreshing finish.
Ingredients
- 2 boxes vanilla wafers
- 6-8 bananas, sliced
- 2 cups milk
- 1 container strawberries, hulled and sliced
- 1 (5 oz.) box French Vanilla pudding mix
- 1 (8 oz.) package cream cheese, softened
- 1 (14 oz.) can sweetened condensed milk
- 1 (12 oz.) container whipped topping, thawed
Instructions
- Step 1: In a large bowl, beat the softened cream cheese until smooth. Gradually add the sweetened condensed milk, continuing to beat until well combined. Set this mixture aside.
- Step 2: In a separate bowl, whisk the French Vanilla pudding mix with the milk for 2 minutes until the mixture thickens. Let it sit for 1-2 minutes to firm up.
- Step 3: Combine the cream cheese mixture with the prepared pudding. Gently fold in half of the thawed whipped topping until just combined.
- Step 4: Arrange a single layer of vanilla wafers on the bottom of a 9×13-inch dish or a large trifle bowl, breaking some wafers to fit if needed.
- Step 5: Evenly layer half of the sliced bananas and half of the sliced strawberries over the vanilla wafers.
- Step 6: Carefully spread half of the pudding mixture over the fruit layers, making sure it’s evenly distributed.
- Step 7: Repeat the layers with another layer of vanilla wafers, followed by the remaining banana and strawberry slices. Spread the remaining pudding mixture over the fruit.
- Step 8: Top the entire pudding with the remaining thawed whipped topping, spreading it smoothly or creating decorative swirls.
- Step 9: Cover the dish tightly with plastic wrap and refrigerate for at least 4 hours, or preferably overnight, to allow the flavors to meld and the wafers to soften before serving.
Tips & Variations
- For extra flavor, sprinkle a little cinnamon or nutmeg over the banana layers before adding pudding.
- Use fresh or frozen strawberries depending on availability; thaw frozen berries well to avoid excess moisture.
- Substitute the vanilla wafers with graham crackers for a slightly different texture and taste.
- Make individual servings using clear cups or small jars for a fun presentation.
Storage
Store the pudding covered in the refrigerator for up to 3 days. The wafers will continue to soften over time, making the dessert creamier. If desired, let the pudding sit at room temperature for 10-15 minutes before serving to soften the chilled cream topping slightly.
How to Serve
Serve this delicious recipe with your favorite sides.
FAQs
Can I make this pudding ahead of time?
Yes, this pudding benefits from chilling overnight to allow the flavors to meld and the wafers to soften perfectly.
Can I use fresh whipped cream instead of store-bought whipped topping?
Absolutely! Fresh whipped cream works wonderfully and adds a light, fluffy texture to the pudding.
Print
Strawberry Banana Pudding Dream: Easy No-Bake Recipe! Recipe
- Total Time: 4 hours 15 minutes (including chilling time)
- Yield: 12 servings 1x
- Diet: Vegetarian
Description
This Strawberry Banana Pudding Dream is an easy, no-bake dessert that layers creamy vanilla pudding, fresh bananas, juicy strawberries, and crunchy vanilla wafers topped with whipped cream. Perfect for a quick and delicious treat without turning on the oven.
Ingredients
Base and Fruit Layers
- 2 boxes vanilla wafers
- 6–8 bananas, sliced
- 1 container strawberries, hulled and sliced
Pudding Mixture
- 1 (5 oz.) box French Vanilla pudding mix
- 2 cups milk
- 1 (8 oz.) package cream cheese, softened
- 1 (14 oz.) can sweetened condensed milk
- 1 (12 oz.) container whipped topping, thawed
Instructions
- Prepare Cream Cheese Mixture: In a large bowl, beat the softened cream cheese until smooth, then gradually beat in the sweetened condensed milk until well combined. Set this mixture aside.
- Make the Pudding: In a separate bowl, whisk the French Vanilla pudding mix with milk for about 2 minutes until thickened. Let it sit for 1-2 minutes to firm up.
- Combine Mixtures: Mix the cream cheese mixture with the prepared pudding and gently fold in half of the thawed whipped topping until just combined for a light, creamy texture.
- Layer Wafers: Arrange a single layer of vanilla wafers on the bottom of a 9×13-inch dish or large trifle bowl, breaking some to fit as needed.
- Add Fruit Layer: Evenly layer half of sliced bananas and half of sliced strawberries over the wafers.
- Spread Pudding: Carefully spread half of the pudding mixture evenly over the fruit.
- Repeat Layers: Add another layer of vanilla wafers, followed by the remaining bananas and strawberries. Then spread the remaining pudding mixture over the top.
- Top with Whipped Topping: Spread the remaining whipped topping smoothly or create decorative swirls on top.
- Chill: Cover the dish tightly with plastic wrap and refrigerate for at least 4 hours or overnight to let the flavors meld and wafers soften before serving.
Notes
- Use ripe but firm bananas to avoid browning too quickly.
- For extra flavor, chill the pudding mixture before assembling.
- The dessert can be made up to a day ahead for convenience.
- If desired, garnish with additional fresh strawberries or a sprinkle of crushed wafers before serving.
- Consume within 2 to 3 days for best freshness.
- Prep Time: 15 minutes
- Cook Time: 0 minutes
- Category: Dessert
- Method: No-Cook
- Cuisine: American
Keywords: Strawberry banana pudding, no-bake dessert, vanilla wafer pudding, easy summer dessert, creamy fruit pudding
